Travel Photography Gear Checklist: Pack Smart, Shoot More
Your core travel photography gear checklist fits in a single carry-on: a mirrorless primary body, one versatile zoom (24–70mm or 24–105mm range), a lightweight tele or fast prime, a few extra batteries, multiple high-speed memory cards (SanDisk Extreme Pro is the go-to), a compact travel tripod like the Peak Design Travel Tripod, and a rugged NVMe SSD (Samsung T7) for on-the-road backups. That’s your foundation. Everything else is a judgment call based on trip type, weight tolerance, and what you’re actually shooting.
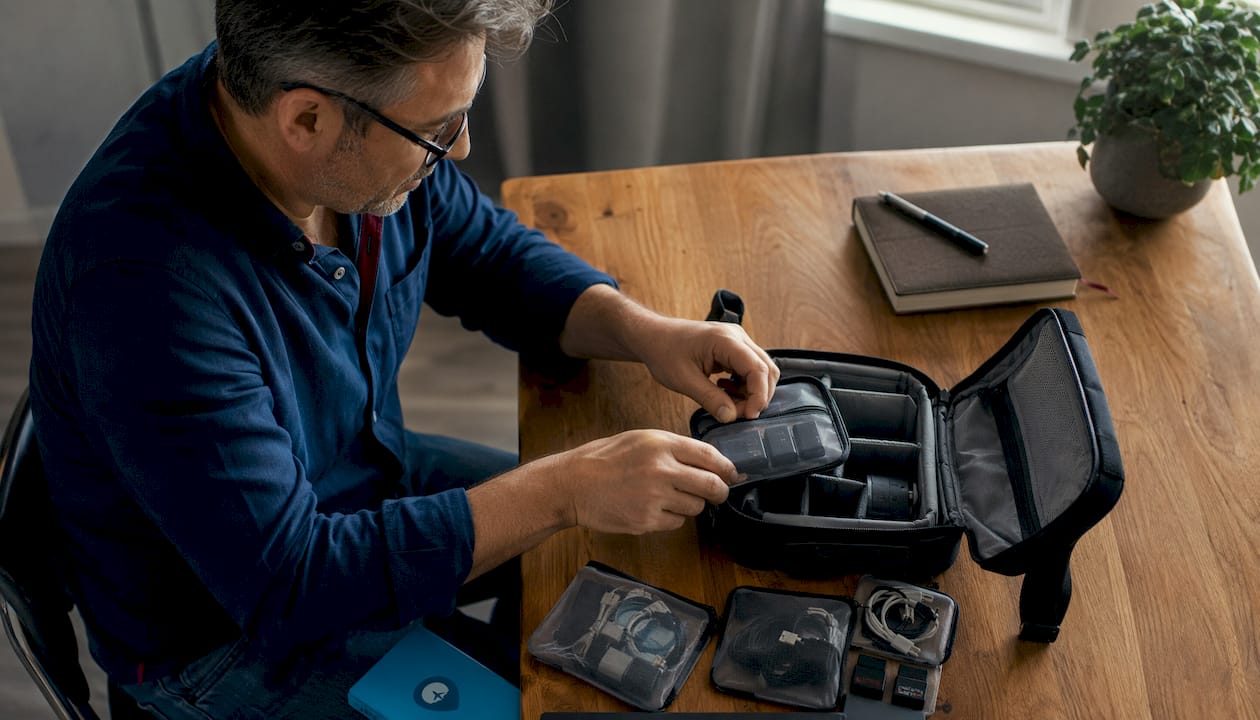
The single most important rule? Keep all camera gear in your carry-on. Checked bags get lost, thrown around, and sometimes pilfered. Your bodies, lenses, batteries, cards, and primary SSD should never leave your sight in transit. Mirrorless systems are now the industry standard for travel photography precisely because they’re compact enough to make this carry-on-first approach realistic without sacrificing image quality.
Quick carry-on essentials at a glance:
- Primary mirrorless body (loaded with a card and fresh battery)
- Versatile zoom lens (24–70mm or 24–105mm)
- Lightweight tele or fast prime (50mm f/1.4 or 70–200mm)
- A few extra batteries + charger
- multiple SanDisk Extreme Pro memory cards in a hard case
- Peak Design Travel Tripod or compact carbon fiber alternative
- Samsung T7 rugged SSD (2TB) + USB-C card reader
- Cleaning kit, rain cover, silica gel packets
Pro Tip: Pack by access frequency. Your primary body and go-to lens go in the quickest-access compartment. Batteries, cards, and cables go in internal pockets. Cleaning kit and adapters go in secondary pouches. You’ll thank yourself at 5 AM when you’re scrambling for golden hour.
Table of Contents
- Which camera body should you bring on a trip?
- What lenses should you actually pack?
- What accessories do you actually need?
- How do you back up photos on the road?
- How should you pack and organize your camera bag?
- Should you bring a drone or specialty gear?
- What are the TSA rules and packing steps for flights?
- Three ready-to-copy example travel kits
- Your printable travel photography gear checklist
- Key Takeaways
- What I’ve learned packing for real adventure trips
- Useful sources and further reading
Which camera body should you bring on a trip?
Lightweight mirrorless bodies are the right call for travel. They’re smaller and lighter than DSLRs, they offer electronic viewfinders that let you preview exposure in real time, and most modern mirrorless systems have weather sealing that holds up in rain and dust. That combination of portability and durability is hard to argue with when you’re hopping between cities or hiking into a canyon.
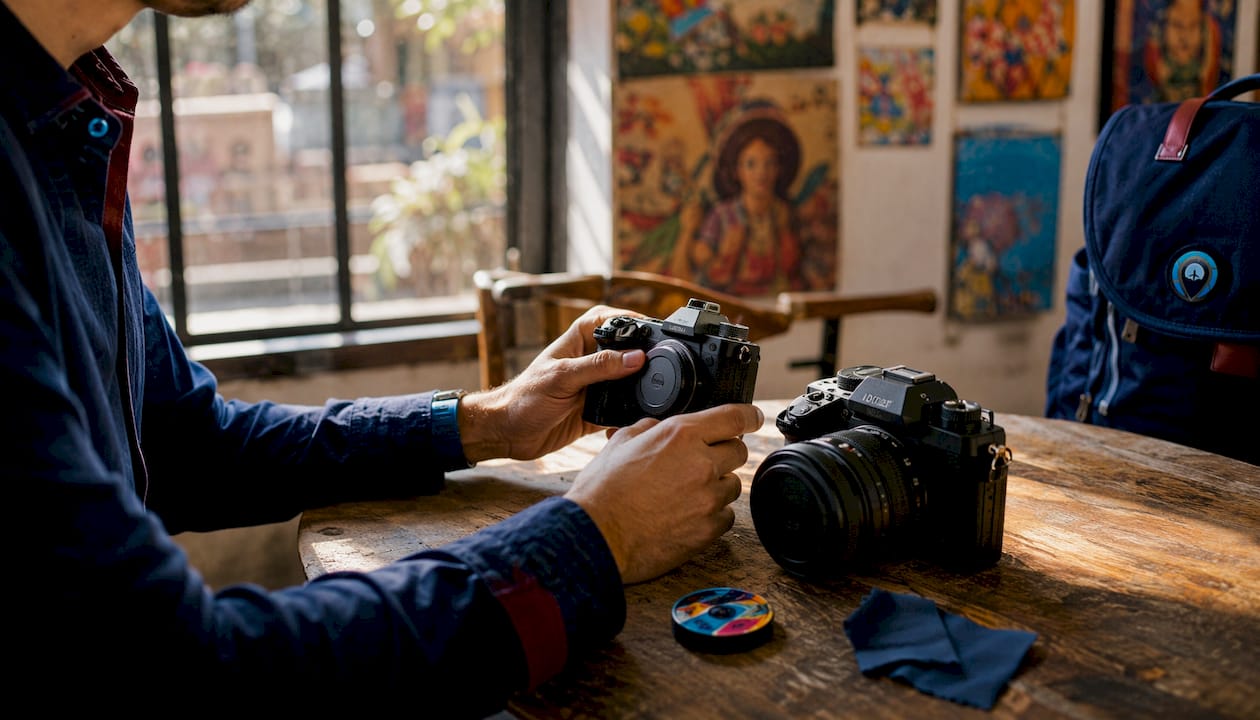
The big sensor-size decision comes down to APS-C vs. full frame. APS-C bodies (crop sensor) are lighter, their lenses are smaller, and the systems tend to cost less. Full-frame bodies deliver better low-light performance and higher dynamic range, which matters for landscapes and night shooting. Neither is universally “better” for travel. It depends on what you’re shooting.
A few system examples to orient you:
- Sony a7 series (full frame): The a7 IV is a 34.1-megapixel workhorse with excellent dynamic range and a mature lens ecosystem. Great for photographers who prioritize image quality and shoot in mixed or low light.
- Fujifilm X Series (APS-C): Compact, beautifully built, and beloved for color science. The X-T5 and X100VI are favorites for travel because they’re genuinely small without feeling like a compromise.
- Canon EOS R series (full frame and APS-C options): The EOS R8 and R50 cover different budgets; the R5 is a powerhouse for those who need resolution and speed.
When to bring a second body: on long multi-destination trips or critical shoots where a body failure would be catastrophic. Otherwise, a backup compact camera or a capable smartphone covers the gap without doubling your carry-on weight.
Pro Tip: Test your battery life under your actual shooting style before you leave. Cold weather, heavy video use, and constant EVF use all drain batteries faster than the spec sheet suggests. Aim for at least 2–3 batteries for a full shooting day, and charge all of them the night before departure.
What lenses should you actually pack?
The classic answer is the “Holy Trinity”: a 16–35mm ultra-wide, a 24–70mm standard zoom, and a 70–200mm telephoto. Together, they cover the majority of travel shooting scenarios from architecture and landscapes to wildlife and portraits. But carrying three fast zooms is heavy, expensive, and honestly overkill for most trips.
For strict weight limits or carry-on-only travel, a single high-quality 24–70mm or 24–105mm is the most versatile all-purpose solution. You give up reach and ultra-wide drama, but you gain simplicity and speed. No lens swapping means no dust on your sensor and no missed moments while you’re digging through your bag.
Lens type comparison
Example lens kits by trip goal:
- Minimalist/city kit: One fast prime (35mm or 50mm f/1.8) + a superzoom (18–200mm or 24–240mm). Light, fast to shoot, great for street and casual travel.
- Balanced multi-day kit: 24–70mm f/2.8 + 16–35mm + 70–200mm f/4. Covers everything; heavier but worth it for dedicated photo trips.
- Wildlife/adventure kit: A reach-focused tele (100–400mm or 70–300mm) + a versatile midrange (24–70mm). Prioritizes subject distance over wide-angle coverage.
- Minimalist street kit: A single 35mm or 50mm prime. Forces creative discipline and keeps your bag genuinely light.
How many lenses should you bring? Run through this checklist:
- How long is the trip, and how many shooting days do you have?
- What subjects are you primarily shooting (wildlife, landscape, street, portraits)?
- Is there a camera store nearby if you realize you need something?
- How much does your bag weigh with the lenses included?
- Will you be changing lenses outdoors in dusty, wet, or windy conditions?
If the answer to #5 is “yes, often,” seriously consider a single versatile zoom. Sensor dust from frequent lens swaps in the field is a real problem, and cleaning a sensor mid-trip is stressful.
What accessories do you actually need?
The core accessory list is shorter than most gear guides make it sound: multiple high-speed memory cards, 2–3 charged batteries, a compact carbon fiber travel tripod, a circular polarizer and ND filter, a cleaning kit, a rain cover or dry bag, and a rugged SSD. That’s it. Everything else is situational.
Full accessory breakdown:
- Memory cards: Carry multiple SanDisk Extreme Pro cards rather than one massive card. Multiple smaller cards reduce single-point failure risk. If your camera uses CFexpress, bring the right card type and a compatible reader.
- Batteries: 2–3 minimum; 3–4 for full-day shoots or cold climates. Store spares in a padded pouch, not loose in your bag.
- Tripod: The Peak Design Travel Tripod folds smaller than most and is genuinely carry-on friendly. For ultralight trips, a Joby GorillaPod or a tabletop tripod handles most stability needs without the bulk of a full-size carbon fiber setup.
- Filters: A circular polarizer is the single highest-impact filter for travel. It cuts glare off water, deepens blue skies, and punches up colors in a way that’s hard to replicate in post. An ND filter (6-stop or 10-stop) opens up long-exposure options for waterfalls and seascapes.
- Cleaning kit: Rocket blower, sensor gel stick or swabs, microfiber cloth, and lens cleaning solution. Do a wet-sensor clean before long trips to avoid dust spots in every frame.
- Rain cover/dry bag: A simple rain sleeve weighs almost nothing and saves your gear in a sudden downpour. Silica gel packets in your bag absorb moisture in humid climates.
The tripod question is worth a moment. A full travel tripod is worth packing if photography is the primary purpose of your trip. If you’re on a family vacation and squeezing in some shooting, a Gorillapod or even a small tabletop tripod is usually enough and won’t take up precious carry-on space.
Pro Tip: Label all your cables and chargers before you leave. Consolidate to USB-C Power Delivery wherever possible. One USB-C PD brick can charge your camera, laptop, phone, and SSD. That’s four fewer proprietary chargers rattling around your bag.
How do you back up photos on the road?
The rule is simple: never delete a memory card until your files exist in at least two other locations. One copy on your laptop or tablet, one copy on a rugged SSD. Only then is it safe to reformat a card.
Practical backup workflow:
- Offload cards to both the laptop and the Samsung T7 at the end of each shooting day.
- Verify the transfer visually (spot-check a few files) before reformatting anything.
- Keep original cards intact until both copies are confirmed.
- Store the SSD in a different bag from your laptop. If one bag gets stolen, you still have the other copy.
For connectivity, a USB 3.2 card reader makes a real difference in transfer speed, especially with high-resolution files from a 60-megapixel body. CFexpress readers are faster still if your camera uses that format. Plan for offline transfers at the hotel rather than relying on café Wi-Fi for cloud uploads.
How should you pack and organize your camera bag?
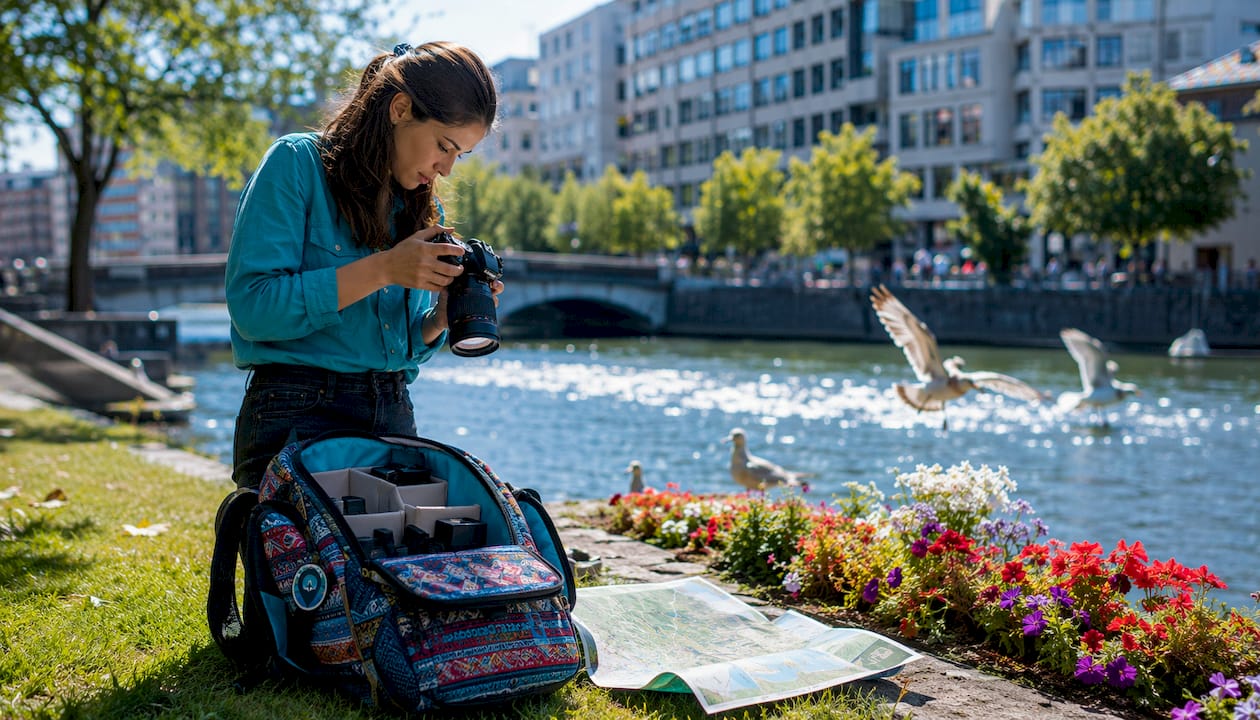
The right bag depends on your trip type, but the packing logic is the same regardless of what you’re carrying it in. Primary body and go-to lens go in the most accessible compartment. Batteries and cards go in an internal pocket. Cleaning kit, cables, and adapters go in secondary pouches.
Bag types and when they make sense:
- Camera backpack: Best for hiking, multi-day trips, and flight-heavy itineraries. Distributes weight evenly and fits in overhead bins. Look for weather-resistant material and modular dividers.
- Sling bag: Great for urban shooting and day trips where you need fast access to your camera. Less comfortable for long hikes.
- Camera insert inside a travel backpack: The most flexible option. Use a padded insert (like the Peak Design Camera Cube or F-Stop ICU) inside a regular travel backpack. You get camera protection without committing to a dedicated camera bag for the whole trip.
- Roller/rolling case: Convenient for airport transit but impractical once you’re on foot. Not recommended as your primary carry-on for active travel.
For packing strategies that work, the key is treating your bag like a frequency map. What do you reach for most? That goes in front. What do you use once a day? That goes in the middle. What do you only need at the hotel? That goes at the bottom.
Pro Tip: Use clear, labeled zip pouches for cables and chargers. It sounds fussy, but it saves you from unpacking everything at airport security and from spending 10 minutes hunting for your card reader at 6 AM. Small tracking tags on your main bags are worth it too.
Should you bring a drone or specialty gear?
Bring a drone only if it materially adds shots you genuinely cannot capture any other way. Aerial perspective over a canyon, a coastline at sunrise, a remote glacier. If you’re shooting city streets or a museum tour, the drone stays home.
Before you pack one, run through these checks:
- Remote ID and registration: In the US, drones over 0.55 lbs require FAA registration and Remote ID compliance. Many other countries have their own registration requirements.
- Airline battery rules: Lithium batteries for drones must travel in carry-on, not checked bags. Check the watt-hour rating against your airline’s specific limits.
- Location restrictions: National parks, airports, stadiums, and many international sites prohibit drone flight. Research before you go, not after you land.
Action cameras like the Insta360 X4 make sense for wet environments, adventure sports, and any situation where you’d hesitate to put your main camera at risk. They’re small, pack in a dedicated case, and handle conditions that would destroy a mirrorless body. If you’re kayaking, surfing, or mountain biking, an action cam earns its spot.
Pro Tip: If you bring a drone, consolidate all its batteries in a labeled, fireproof LiPo bag in your carry-on. Register the drone before you leave home, download the local airspace app for your destination, and budget extra carry-on space. A drone without its batteries is just dead weight.
What are the TSA rules and packing steps for flights?
Always carry camera bodies, lenses, spare batteries, cards, and your primary SSD in your carry-on. This isn’t just a preference. Checked baggage handlers are not gentle, and airlines’ liability for electronics in checked bags is limited. Carry expensive gear in your carry-on to avoid damage or loss.
TSA and airline battery rules:
- Spare lithium batteries (camera batteries, drone batteries, power banks) must go in carry-on, not checked bags.
- Most camera batteries fall well within the standard 100Wh carry-on limit, but check your airline’s specific policy for drone batteries, which can be larger.
- Carry batteries in protective cases or original packaging to prevent short circuits.
- Large batteries (100–160Wh) may require airline approval in advance.
Security and insurance steps:
- Photograph serial numbers for every body and lens before you leave. Store those photos in cloud storage.
- Label gear with your contact info (a small sticker inside the bag works).
- Check whether your homeowner’s or renter’s insurance covers camera gear abroad. Many policies have low limits or exclude electronics. Dedicated camera gear insurance is worth considering for high-value kits.
- Pack discreetly. A plain black backpack draws less attention than a bag covered in camera brand logos.
At security, keep a small accessible pouch with your memory cards, any removable batteries, and your passport. It speeds up the X-ray process and means you’re not digging through your whole bag at the conveyor belt.
Pro Tip: In humid climates, pack silica gel packets in every compartment of your camera bag. In sandy or snowy environments, keep a rain cover on your bag and a basic cleaning kit in your top pocket. For destination-specific packing, a guide like the Grand Canyon packing guide can flag environment-specific hazards you might not think of until you’re already there.
Three ready-to-copy example travel kits
These three kits cover the most common trip types. Pick the one closest to your situation and adjust from there.
Kit 1: Minimalist city/carry-on kit
Who it’s for: solo travelers, city trips, anyone flying carry-on only.
- Body: Fujifilm X Series APS-C body (X-T5 or X100VI). Light, compact, excellent color.
- Primary lens: 18–55mm f/2.8–4 kit zoom or a 35mm f/1.4 prime.
- Secondary lens: None, or a small 70–300mm if you want reach.
- Tripod: Joby GorillaPod 3K or a small tabletop tripod.
- Memory: multiple SanDisk Extreme Pro memory cards.
- Batteries: 2 batteries + USB-C charger.
- Storage: Samsung T7 1TB + lightweight laptop or iPad.
- Bag: Small camera sling or camera insert in a 20L daypack.
Why it works: The whole kit fits in a personal item or small carry-on. The APS-C body keeps weight down without sacrificing image quality for street and travel shooting.
Kit 2: Balanced multi-day kit
Who it’s for: dedicated photo trips, multi-destination travel, landscape and portrait work.
- Body: Sony a7 IV (full frame, 34.1MP).
- Primary lens: Sony 24–70mm f/2.8 GM.
- Secondary lens: Sony 16–35mm f/2.8 GM or 70–200mm f/4.
- Tripod: Peak Design Travel Tripod (carbon fiber).
- Memory: multiple SanDisk Extreme Pro memory cards.
- Batteries: 3 batteries + dual charger.
- Filters: Circular polarizer + 6-stop ND.
- Storage: Samsung T7 2TB + laptop.
- Bag: Camera backpack (30L) with modular dividers.
Why it works: The 24–70mm all-purpose zoom handles 80% of situations; the second lens covers the gaps. Full-frame sensor earns its weight for landscape dynamic range and low-light performance.
Kit 3: Wildlife/adventure kit
Who it’s for: safari, nature, remote expedition photography.
- Body: Sony a7 series or Canon EOS R series with weather sealing.
- Primary lens: 100–400mm f/4.5–5.6 (reach is everything for wildlife).
- Secondary lens: 24–70mm f/2.8 for camp, environment, and portrait shots.
- Tripod: Full carbon fiber travel tripod with ball head.
- Memory: multiple SanDisk Extreme Pro memory cards.
- Batteries: 4 batteries + solar charger panel for remote locations.
- Filters: Circular polarizer only (ND less critical for wildlife).
- Storage: Samsung T7 2TB + second rugged SSD for redundancy.
- Protection: Rain cover, dry bag, silica gel, lens cloth.
- Bag: 40L adventure backpack with camera insert.
Why it works: Reach and redundancy are the priorities. Four batteries and two SSDs account for remote locations where charging and data recovery aren’t easy. Check the adventure travel checklist for environment-specific additions.
Your printable travel photography gear checklist
Use this as your final pack-up check before every trip. Tick each category before you zip the bag.
Camera bodies and lenses
- [ ] Primary mirrorless body (battery installed, card inserted)
- [ ] Primary lens (caps on, UV filter attached)
- [ ] Secondary lens or prime (if bringing)
- [ ] Lens cloths and caps accounted for
Power and cards
- [ ] a few extra batteries (fully charged)
- [ ] Camera charger or USB-C PD brick
- [ ] multiple memory cards in hard case
- [ ] USB-C card reader
- [ ] Power bank (carry-on only)
- [ ] Universal travel adapter (for international trips)
Support and protection
- [ ] Travel tripod or Gorillapod
- [ ] Circular polarizer filter
- [ ] ND filter (if shooting landscapes/long exposures)
- [ ] Rain cover or dry bag
- [ ] Silica gel packets (2–4 per bag compartment)
- [ ] Rocket blower and sensor cleaning kit
Computing and backup
- [ ] Laptop or tablet
- [ ] Samsung T7 SSD (or equivalent rugged drive)
- [ ] USB-C cables (2 minimum)
- [ ] Second SSD (for high-value or remote trips)
Misc and documents
- [ ] Serial number photos saved to cloud
- [ ] Gear insurance documents or policy number
- [ ] Drone registration paperwork (if applicable)
- [ ] Passport and travel documents in accessible pouch
Carry-on quick check at the gate:
- Battery in camera? ✓
- Cards in card case, not loose? ✓
- SSD in bag with cable? ✓
- Primary camera accessible (not buried)? ✓
- Batteries in carry-on, not checked bag? ✓
For trip-specific packing variations, separate your checklist into “carry-on only” and “carry-on + checked bag” columns. It makes it much easier to decide what gets left behind when weight limits get tight.
Key Takeaways
A solid travel photography kit comes down to three decisions: carry-on-first packing, a mirrorless body matched to your trip type, and redundant backup storage before you clear a single card.
| Point | Details |
|---|---|
| Always carry gear in carry-on | Camera bodies, lenses, batteries, and SSDs should never go in checked baggage. |
| Choose mirrorless for travel | Mirrorless systems offer the best balance of weight, durability, and image quality for travel. |
| Pack multiple smaller cards | Four to five SanDisk Extreme Pro cards beats one large card for redundancy and failure protection. |
| Back up before deleting | Keep files on both a laptop and a rugged SSD (Samsung T7) before reformatting any memory card. |
| Match kit to trip type | A minimalist APS-C kit suits city travel; a full-frame kit with a telephoto suits wildlife and landscape trips. |
What I’ve learned packing for real adventure trips
There’s a version of this checklist that lives in my head, and it’s shorter than any list I’ve ever written down. It goes: one body, one great lens, enough cards and batteries to last the day, and a way to back everything up at night. That’s the core. Everything else is negotiable.
The hardest lesson I’ve internalized is that the best kit isn’t the most capable one. It’s the one you’ll actually carry. I’ve watched photographers haul three-lens setups through airports, arrive exhausted at a location, and spend the first hour of golden light reorganizing their bag instead of shooting. Meanwhile, someone with a single zoom and a compact body already has 200 frames in the can.
That said, there are real moments where the extra reach or the extra stop of light genuinely changes what’s possible. A 10-day multi-destination trip through Southeast Asia calls for a different kit than a single-location landscape workshop in Iceland. For the former, I’d compress to a single versatile zoom and a fast prime. For the latter, I’d bring the full trinity and a solid tripod, because I know exactly what I’m shooting and I have the time to set up properly.
The gear decisions that matter most aren’t about which brand or which megapixel count. They’re about redundancy (always two copies before you delete anything), access frequency (primary body in the front pocket, not buried), and environment protection (silica gel in humid climates, rain cover in wet ones). Get those three things right and the rest is fine-tuning.
If you’re planning a trip and want to see how these decisions play out in the field, the Traveling Portrait travel photography workshop is a good place to work through kit choices with real destinations in mind.
Useful sources and further reading
A few places worth bookmarking as you build and refine your kit:
- What’s in my camera bag — Traveling Portrait’s own bag breakdown with real packing examples and organization tips.
- Best travel photography gear guide — Deeper product context and compact kit recommendations from Traveling Portrait.
- Must-have gear for a traveling photographer — PhotographyLife’s field-tested list covering bodies, lenses, accessories, and overseas travel specifics.
- Camera gear insurance guide — CaliCuration’s breakdown of insurance options for cameras and phones while traveling.
- Adventure travel gear checklist — Traveling Portrait’s adventure-specific checklist for remote and multi-day expeditions.
- PhotographyLife packing list — Practical carry-on-first packing strategies and accessory priorities from experienced travel photographers.
Recommended
Other Posts You Might Like