
How to Plan Travel Around Festival Dates: 2026 Guide
The single best sequence: buy festival tickets first, then lock an arrival buffer night, then book accommodation near reliable transport, then purchase refundable flights or trains built around those fixed dates. Treat the festival date as immovable and design every other decision around it.
Quick checklist to act on right now:
- Secure festival tickets (pre-registration often required for major events like Coachella or Tomorrowland)
- Book one arrival buffer night before the first festival day
- Shortlist two accommodation options near a transit hub
- Buy refundable transport within 72 hours of ticket confirmation
- Download and back up tickets offline before you leave home; mobile-only tickets fail without signal
- Set up a simple contingency folder (alternate flights, nearby hotels, insurance docs)
For photographers specifically:
- Pack your primary camera, one fast prime, and a stabilized zoom as carry-on
- Map golden-hour times against the festival schedule before you arrive
- Carry at least two fully charged backup batteries and dual storage cards
Table of Contents
- When should you start planning a festival trip?
- How do you structure each day around festival programming?
- What are the smartest logistics moves for festival travel?
- Where should you stay: campsite, nearby hotel, or transit hub?
- What photography gear and prep do you actually need?
- How do you stay healthy and avoid burnout at multi-day events?
- How do you find local guides and photography contacts at festivals?
- What’s your backup plan when things go wrong?
- Sample 3-, 5-, and 7-day festival itinerary templates
- Key Takeaways
- What festival planning actually taught me
- Ready to turn your next festival into a real photo trip?
When should you start planning a festival trip?
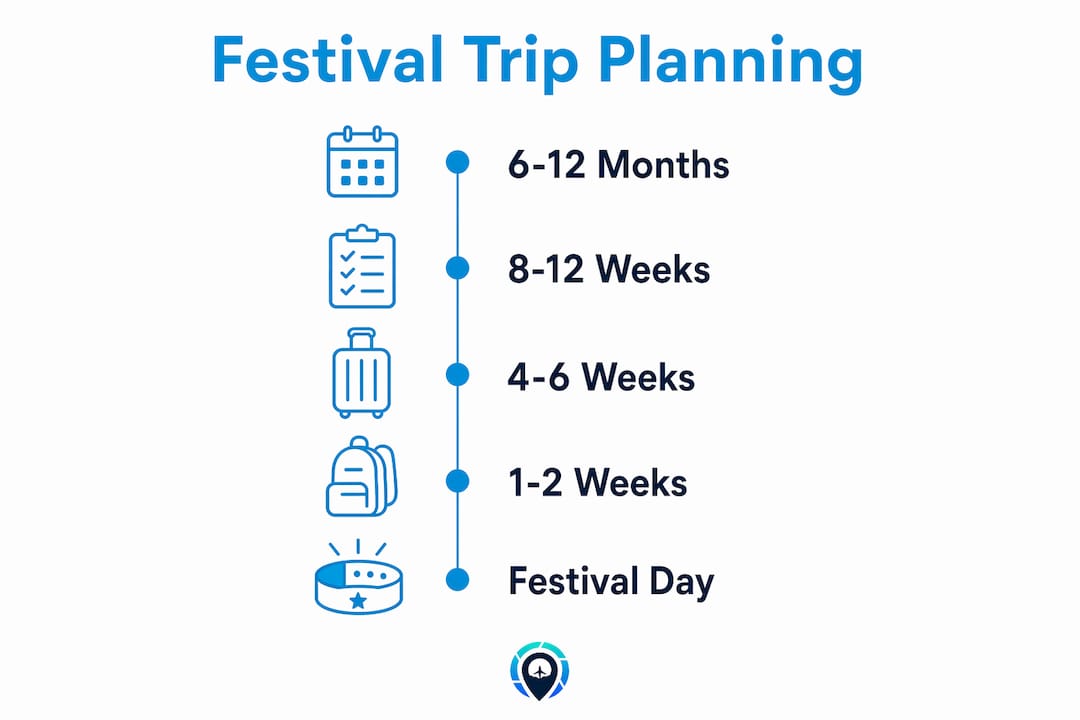
The earlier you move, the cheaper and less stressful everything gets. Booking 8–12 weeks ahead saves significantly on flights and hotels compared to last-minute scrambles.
| Timeline | Action |
|---|---|
| 6–12 months out | Register for pre-sale access; research festival format and camping vs. hotel options |
| 3–6 months out | Buy festival tickets the moment the sale opens; book accommodation immediately after |
| 8–12 weeks out | Purchase flights or trains; book photographer accreditation or press passes if needed |
| 4–6 weeks out | Confirm gear insurance, travel insurance, and visa requirements |
| 1–2 weeks out | Equipment check, backup media, offline ticket download, contingency folder complete |
Hotels near major festival cities spike hard once tickets go on sale publicly. The festival-city pricing effect is real: rooms, taxis, and even restaurants all climb around big events, so early booking and alternate airports can save you real money.
How do you structure each day around festival programming?
Start with the festival schedule as your anchor. Sightseeing, food walks, and photography outings fill the gaps around stage times, not the other way around. Insufficient recovery is the most common festival-travel mistake, and it’s what turns a dream trip into a blur by day three.
A practical daily rhythm for a multi-day event looks like this:
- Morning (light): Slow breakfast, gear check, review the day’s stage schedule
- Mid-morning: One local micro-experience (market, neighborhood walk, coffee spot)
- Afternoon: Main festival block, one must-see set, scout secondary stages
- Early evening: Brief rest, recharge batteries (yours and your camera’s)
- Evening/night: Main headliner or headline stage
- Post-event: Hydrate, back up photos, plan tomorrow’s priorities
For short festivals like La Tomatina, treat the one-hour event as the anchor of a multi-day trip so the travel time and surrounding culture genuinely justify the journey. The non-event days are where a festival trip becomes a real trip, with local food walks and scenic photography rather than just waiting around.
Pro Tip: Check sunrise and sunset times for the festival city before you leave home. Map those golden-hour windows against the stage schedule so you can slip out for a silhouette or crowd shot during a set you’re less invested in, then be back in position for your must-see act.
What are the smartest logistics moves for festival travel?
Getting there without drama is half the battle. Here’s the priority order:
- Arrive at least one full buffer night before the event. This absorbs delays, check-in problems, and jet lag without putting the festival at risk.
- Avoid early-morning departures the day after a major event. You’ll be exhausted, and post-festival transport is chaotic.
- Compare airports on door-to-venue time, not just ticket price. A cheaper flight into a secondary airport that adds two hours of ground transfer can cost more in taxis and stress than a direct route.
- For inter-city festival routing, trains and buses often beat flights. Trains are city-center to city-center, skip airport security, and frequently cost less when booked ahead.
- Reserve ground transfers in advance. During large events, rideshare surge pricing peaks immediately after shows end. Know your exit route before the encore.
- Build a backup transport budget. Experienced planners list secondary airports and alternate transit modes so a single delay doesn’t wreck the whole trip.
Where should you stay: campsite, nearby hotel, or transit hub?
Your accommodation choice shapes everything from how rested you are to how quickly you can get your gear back to a safe space.
- On-site camping suits multi-day destination festivals (think Coachella, Glastonbury when it runs). You skip the daily commute and stumble back at 4 AM without waiting for a shuttle. The trade-off: communal showers, gear security concerns, and limited charging options.
- Venue-adjacent hotels offer the best of both worlds for urban festivals like Lollapalooza. Walkability saves taxi costs post-show, and you get a real bed and a secure room for your camera gear.
- A nearby transit hub is often the smartest base when venue-adjacent rooms are sold out or wildly overpriced. For Tomorrowland, basing in Antwerp puts you 16 km from De Schorre with frequent shuttle access, plus a genuinely great city to explore on recovery days.
For photographers: prioritize a room with a desk, reliable power outlets, and a safe to store gear. Ground-floor rooms near festival fields are convenient but noisier. A mid-range hotel in a transit hub usually offers better workflow conditions than a premium glamping tent.
Book with flexible cancellation whenever possible. Nearby towns like Palm Springs for Coachella can fill 6–12 months in advance for the biggest events, so don’t wait.
What photography gear and prep do you actually need?
Keep it lean and purposeful. Festival photography rewards mobility over maximum kit.
Essential gear checklist:
- Primary camera body + one fast prime (f/1.8 or faster for low light)
- Stabilized zoom for crowd and stage shots from distance
- Minimum two fully charged spare batteries; festivals drain power fast
- Dual memory cards with a shoot-to-backup routine after every session
- Weather-sealed bag or rain cover (outdoor festivals are unpredictable)
- Lightweight travel tripod or GorillaPod for long-exposure crowd shots
Permissions and policies: Check the festival’s official attendee guide for bag size limits, prohibited lens lengths, and restricted zones before you pack. Many major festivals ban detachable lenses entirely for general admission. If you want real access, apply for press or photographer accreditation weeks in advance, not the day before. Bag checks at entry are thorough.
Pro Tip: For low-light festival photography, start at ISO 1600 with a wide aperture and adjust from there rather than chasing a “correct” exposure. Embrace motion blur in crowd shots at 1/30s — it often reads as energy rather than error. Back up every shoot to a second card before you sleep.
Pro Tip: Check Traveling Portrait’s travel photography workshop page for structured guidance on festival and event photography techniques.
How do you stay healthy and avoid burnout at multi-day events?
Recovery isn’t optional. Schedule at least one full rest morning per 48–72 hours of intense festival activity. Back-to-back full days without downtime leads to missed highlights, not more of them.
- Hydration: Carry a reusable water bottle; free refill stations exist at most major festivals
- Ear protection: Foam earplugs or custom-fit plugs protect your hearing across multi-day events
- Sun protection: Sunscreen, sunglasses, and a hat for daytime outdoor stages
- Food pacing: Eat a proper meal before entering the venue; festival food prices are high and lines are long
- First-aid kit: Blister pads, pain relief, antihistamines, and any personal medications
- Safe exit routes: Identify crowd-avoidance exits before the headliner ends; leaving five minutes early saves 30 minutes of crush
Avoiding common bucket-list trip mistakes like over-scheduling and ignoring energy management is what separates a great festival trip from an exhausting one.
How do you find local guides and photography contacts at festivals?
The best festival experiences often come from local connections who know shortcuts, the rhythm of celebrations, and crowd-avoidance tactics. Local hosts and small-group guides often know quiet photo vantage points and non-obvious times to shoot stage or crowd scenes.
- Book through a vetted local guide platform like Experience by Locals before you travel. Look for guides with recent festival-specific reviews and small-group credentials.
- Join festival community groups on social platforms 4–6 weeks before the event. Photographers often share location tips and meetup times.
- Talk to festival volunteers. They know the site layout, quiet zones, and the best spots for crowd photography better than anyone.
- Offer something in return. A small payment, a meal, or a photo exchange goes a long way. Expecting free insider knowledge rarely works; genuine reciprocity almost always does.
What’s your backup plan when things go wrong?
Build a three-tier contingency plan before you leave:
- Same-day fixes: Alternate transit route, late check-in confirmed with the hotel, offline copies of all tickets and contacts
- Next-day fixes: Refundable flight or train option identified in advance, one backup accommodation option shortlisted
- Trip-level fixes: If the festival cancels, have a nearby region or city worth exploring so the trip isn’t a total loss
Travel insurance for festival trips should cover event cancellations, lost or damaged gear, and medical evacuation. Document everything: keep receipts, photo your gear serial numbers, and save confirmation emails offline. For sold-out situations, use verified resale platforms only. Check local box-office windows on the day of the event; returns and no-shows happen more than people expect.
Sample 3-, 5-, and 7-day festival itinerary templates
These templates work for any festival. Swap in your specific event dates and adjust the local exploration days to the destination.
| Day | 3-Day Trip | 5-Day Trip | 7-Day Trip |
|---|---|---|---|
| 1 | Arrival buffer night, gear check | Arrival buffer night | Arrival + city orientation |
| 2 | Festival day (main event) | Festival day 1 | Buffer/recovery day, local explore |
| 3 | Culture/photography day, depart | Recovery morning + scenic photo outing | Festival day 1 |
| 4 | — | Festival day 2 | Recovery morning |
| 5 | — | Day trip or neighborhood deep dive, depart | Festival day 2 |
| 6 | — | — | Full local exploration/photo day |
| 7 | — | — | Flexible departure day |
Daily checklist for every template:
- Tickets accessible offline and wristband confirmed
- Meeting point agreed with your group
- Battery and memory card check before leaving accommodation
- Hydration plan and safe return route confirmed
For multi-festival trips, choose geographically clustered festivals spaced two to five days apart to reduce transit strain. A 10-day Japan itinerary chaining Gion Matsuri, Tenjin Matsuri, and Nebuta Matsuri shows exactly how this works in practice: festivals spaced with free exploration days in between, each city serving as both a transit hub and a destination.
Key Takeaways
Treat the festival date as the immovable anchor of your trip and build every booking — flights, accommodation, and recovery days — around it to avoid critical failures and maximize photographic opportunities.
| Point | Details |
|---|---|
| Book in the right order | Tickets first, then accommodation, then transport — never the reverse. |
| Arrive with a buffer | One full night before the event absorbs delays without putting the festival at risk. |
| Build in recovery time | Schedule at least one rest morning per 48–72 hours to avoid burnout and missed highlights. |
| Prep gear and permissions | Check festival photo policies and apply for accreditation weeks in advance, not the day before. |
| Traveling Portrait | Use Traveling Portrait’s festival photography guides and workshop resources to plan a trip that works as both an event visit and a serious photo project. |
What festival planning actually taught me
There’s a version of festival travel that looks great on paper and falls apart by day two. You’ve over-scheduled, under-slept, and you’re standing in a crowd with a dead battery and no idea where your camp mates went. I’ve seen it happen, and honestly, the fix is almost always the same: the festival-anchor approach.
When you stop treating the festival as one item on a list and start treating it as the fixed center of the whole trip, everything else clicks into place. The buffer night stops feeling like wasted time and starts feeling like the smartest $80 you spent. The recovery morning stops feeling lazy and starts producing your best shots of the trip, because you’re actually present instead of running on fumes.
The local contact piece is the one most photographers skip, and it’s the one that consistently produces the most memorable images. A volunteer who points you to a side-stage vantage point at the right moment is worth more than any piece of gear. Traveling Portrait’s adventure travel guides dig deeper into this kind of immersive, connection-first approach to trip planning.
Ready to turn your next festival into a real photo trip?
Traveling Portrait is built for exactly this: adventure travelers and photographers who want a festival trip that’s also a genuine destination experience. Whether you’re chasing the light at Tomorrowland, shooting the lantern festivals of Asia, or building a travel photography portfolio from the road, the resources here go well beyond generic planning advice. Browse the photography workshops to find a structured, photo-led festival experience, or explore the destinations hub to match your next festival to a region worth staying in. Have a specific festival in mind? Get in touch for custom trip planning built around your dates, your gear, and your shot list.
Recommended
Other Posts You Might Like