Best Drone Cameras for Landscape Photography in 2026
For landscape photography, a drone with a 1-inch sensor or larger is the minimum worth carrying into the field. The DJI Mavic 4 Pro is the no-compromise pick for serious work, the DJI Air 3S is the all-rounder most photographers should buy, and the DJI Mini 5 Pro is the travel answer when weight limits matter. Here’s the fast shortlist:
- Best professional/no-compromise: DJI Mavic 4 Pro (4/3 Hasselblad sensor, 51-minute flight time) – offers the longest flight time in its class for serious work
- Best all-rounder: DJI Air 3S (1" sensor, dual cameras, 45-minute flight time) – balanced for general landscape photography
- Best travel/sub-250g: DJI Mini 5 Pro (1" sensor, lightweight design, 42-minute flight time, no FAA registration required) – travel-friendly option
- Best budget entry: DJI Mini 4K or DJI Neo
- Best non-DJI alternative: Autel EVO II Pro V3
These picks come from field-tested workshop notes and real-world landscape sessions, cross-checked against spec sheets and independent editorial reviews. Traveling Portrait’s Iceland workshop testing informed the wind-performance and RAW-quality assessments throughout.
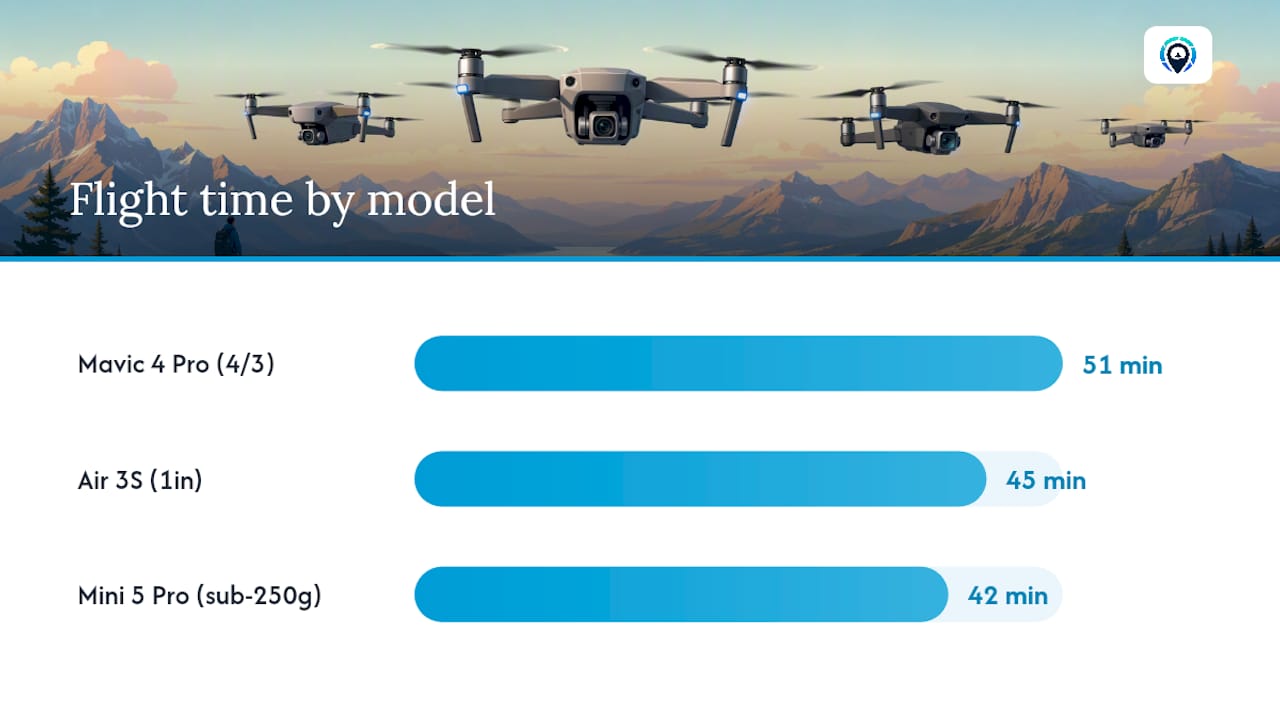
Table of Contents
- How do these drones compare for landscape photography?
- Detailed notes on every model for landscape photographers
- How do you choose the right drone for landscape photography?
- Practical tips for shooting landscape photos with a drone
- What are the U.S. rules for flying a drone for landscape photography?
- How were these picks chosen and tested?
- What does a drone landscape photography kit actually cost?
- Battery and charging strategy for extended landscape shoots
- Key Takeaways
- The drone that actually gets used wins
- Traveling Portrait workshops for drone landscape photographers
- Useful sources and further reading
How do these drones compare for landscape photography?
Callout: The DJI Mavic 4 Pro offers one of the longest flight times in its class among consumer/prosumer drones, enabling extended shooting sessions. For golden-hour landscape sessions where you want multiple passes over a scene, that extra battery life is genuinely useful.
Detailed notes on every model for landscape photographers
These notes focus on what actually matters in the field: sensor performance, wind handling, and real-world shooting experience. Prices are US street/MSRP.
DJI Mavic 4 Pro (~$1,999)
The Mavic 4 Pro is the drone you bring when the shot has to be perfect. Its 4/3-inch Hasselblad main sensor delivers the widest dynamic range in the consumer/prosumer class, which is exactly what you need when you’re shooting a sunrise over a canyon with blown-out sky and deep shadow in the same frame. The triple-camera system (wide, medium, tele) means you can reframe without repositioning the drone, a real advantage when you’re hovering over a cliff edge in moderate wind.
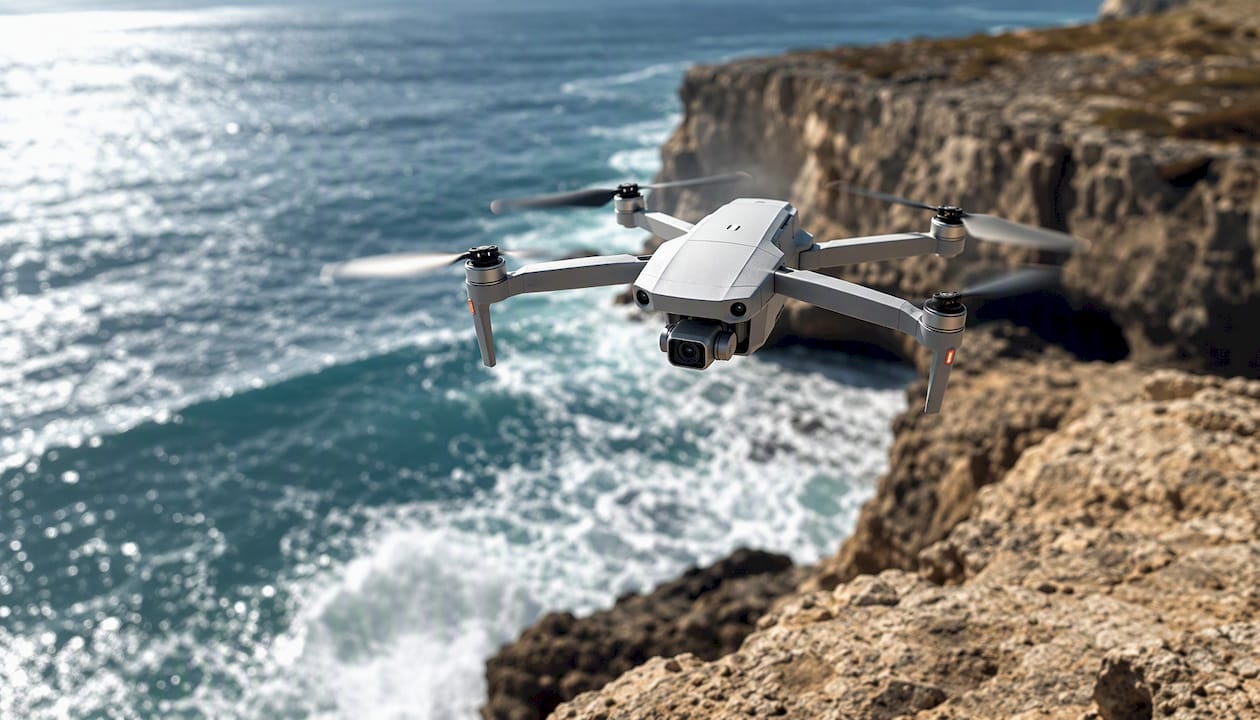
At 1,063 g it’s heavier than most alternatives, so you’ll feel it in your pack on a long hike. But that weight also contributes to stability: in field testing at Iceland workshops, the Mavic 4 Pro held position well in gusty coastal conditions where lighter drones struggled. Its flight time of up to 51 minutes means extended sessions are possible without frequent battery changes. Independent pro testing backs this up, recommending it specifically for no-compromise landscape and commercial work.
Pro Tip: Shoot the Mavic 4 Pro’s main camera in RAW + JPEG simultaneously. The JPEG gives you a quick preview on the controller; the RAW is what you actually edit.
DJI Air 3S (~$1,099)
The Air 3S is the drone most landscape photographers should actually own. A 1" main sensor, a secondary medium-tele camera, omnidirectional obstacle sensing, and a 45-minute flight time in a 723 g body is a genuinely hard combination to beat at this price. Amateur Photographer’s hands-on testing and OfZenandComputing’s January 2026 roundup both land on it as the strongest all-round choice for landscape work.
The tele camera is more useful than it sounds. When you’re shooting a mountain range and want to compress the foreground against a distant peak, switching to the tele without moving the drone gives you a compositional option that single-camera drones simply can’t match.
DJI Mini 5 Pro (~$799)
Sub-250 g with a 1" sensor. That combination is the Mini 5 Pro’s entire pitch, and it’s a compelling one. Drones under 250 g don’t require FAA registration for recreational flyers, which simplifies travel logistics considerably. The sensor matches the Air 3S on paper, though real-world wind handling is slightly softer given the lighter airframe. The Mini 5 Pro offers up to 42 minutes of flight time, making it competitive with larger models.
For travel photographers hiking into remote locations, this is the drone to pack. It fits in a jacket pocket, clears carry-on restrictions easily, and still delivers RAW files with enough dynamic range for serious landscape editing.
DJI Mini 4 Pro (~$759)
The Mini 4 Pro sits just under the 250 g threshold with a 1/1.3-inch sensor and full RAW + AEB support. It’s a strong travel option, though the Mini 5 Pro’s 1-inch sensor gives it a meaningful edge in low-light and high-contrast scenes. If the Mini 5 Pro is out of budget, the Mini 4 Pro is the next best sub-250 g choice.
DJI Mavic 3 Pro (~$2,199)
The Mavic 3 Pro predates the Mavic 4 Pro but remains a serious landscape tool. Its 4/3-inch Hasselblad main sensor matches the Mavic 4 Pro’s imaging pedigree, and the three-camera system covers wide, medium, and tele focal lengths. The main reason to choose it over the Mavic 4 Pro is price: street deals often bring it below $1,800. The main reason not to is the shorter flight time and slightly older obstacle-sensing system.
DJI Air 3 (~$1,099)
The Air 3 is the Air 3S’s predecessor, and it’s still a capable landscape drone. The 1/1.3-inch sensor is a step down from the Air 3S’s 1-inch, which shows in high-contrast scenes and low-light shooting. If you find it at a significant discount, it’s worth considering. At the same price as the Air 3S, there’s no reason to choose it.
Autel EVO II Pro V3 (~$1,649)
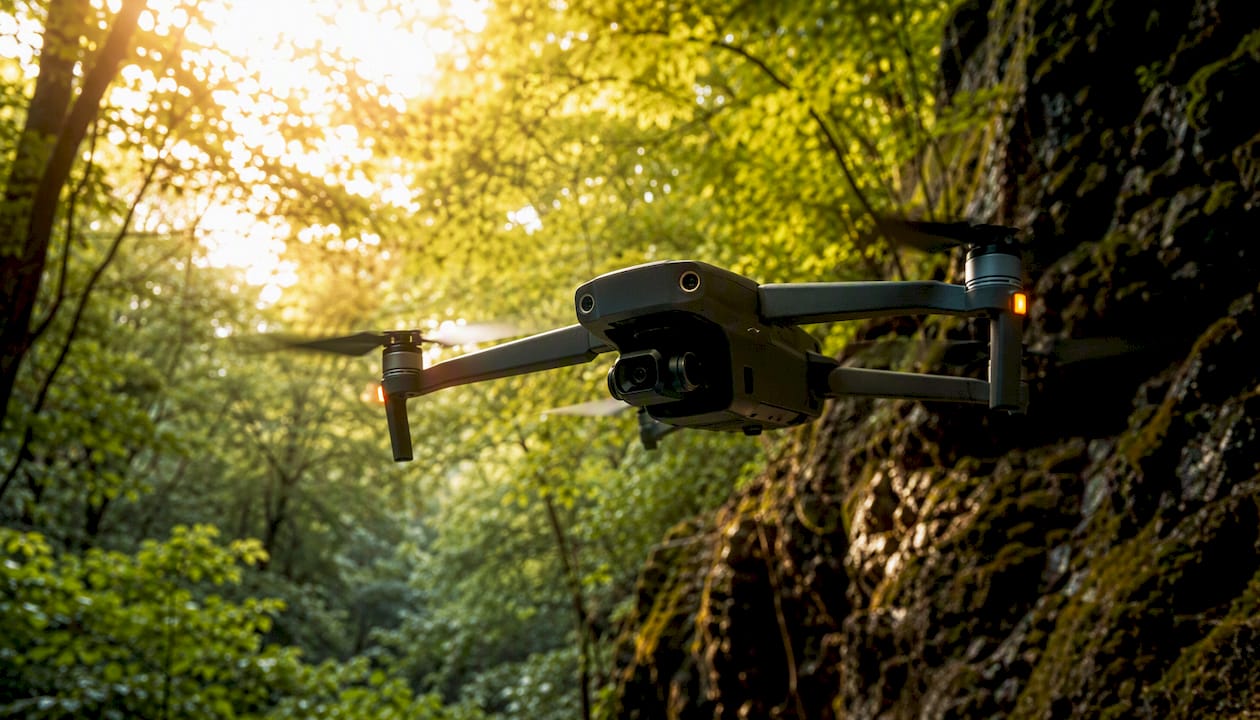
The strongest non-DJI option for serious landscape work. Its 1-inch sensor and omnidirectional obstacle sensing put it in the same tier as the Air 3S on paper, and the Autel ecosystem gives you an alternative supply chain if DJI’s ~94% hobbyist market share makes you uncomfortable with single-vendor dependency. The trade-off is a smaller accessory ecosystem and fewer third-party software integrations. Flight time is competitive at around 42 minutes.
Autel Robotics EVO II Pro (~$1,495)
The earlier Autel platform with a 1-inch sensor. Heavier than the V3 at 1,191 g and with an older firmware ecosystem, but still capable of professional-grade RAW landscape files. A reasonable choice if you find it at a steep discount and want a non-DJI platform.
Autel Evo Lite+ (~$949)
Lighter than the EVO II Pro at 835 g, with a 1/1.28-inch sensor and solid stills performance. It’s a decent middle-ground Autel option for photographers who want something more portable than the EVO II Pro without going full mini-class. Three-direction obstacle sensing is the main safety limitation compared to omnidirectional competitors.
DJI Mini 4K (~$299), DJI Neo (~$199), DJI Flip (~$299)
These three are entry-level options. None support RAW capture, which is a hard limitation for serious landscape editing. The Mini 4K and Flip both hit the sub-250 g threshold and offer 4K video, making them reasonable for casual aerial shots or video-first users. The Neo is the most affordable DJI drone available and shoots decent 4K, but its electronic stabilization and 18-minute flight time make it a casual tool, not a landscape workhorse.
Pro Tip: If you’re buying a budget drone to learn aerial composition before upgrading, the DJI Mini 4K is the pick. It’s sub-250 g, affordable, and teaches you the fundamentals without a big financial commitment. Check the travel photography gear checklist for what else to pack alongside it.
Antigravity A1 (~$299)
The Antigravity A1 appears on 2026 value roundups for its price-to-feature ratio. It’s a budget-friendly option for beginners who want more than the Ryze Tello but aren’t ready to invest in a mid-range drone. RAW support is limited, and the obstacle sensing is basic. Treat it as a learning platform.
DJI Avata 2 (~$649) and DJI Avata 360 (~$999)
Both Avata models are FPV/cine-style drones optimized for immersive video rather than stills. Their stabilized cameras and nimble flight characteristics make them fun for creative motion shots, but the 1/1.7-inch sensors and lack of RAW support limit their usefulness for serious landscape stills. If you want unique low-altitude angles through tight terrain, the Avata 2 is worth a look. For pure landscape photography, neither is the right tool.
DJI Inspire 3 (~$16,000+)
Cinema-grade, full-frame capable, and priced accordingly. The Inspire 3 is a professional production platform, not a landscape photography drone in the consumer sense. It’s worth knowing it exists if you’re doing high-end commercial aerial work, but it’s out of scope for most readers here.
Skydio 2+ (~$999)
The Skydio 2+ has the best obstacle avoidance of any drone on this list, which makes it genuinely useful in complex terrain like dense forests or narrow canyons. The 1/2.3-inch sensor is its limiting factor for landscape stills: dynamic range and low-light performance lag behind 1-inch competitors. If autonomous flight safety in challenging environments is your top priority and image quality is secondary, it’s a legitimate choice.
Ryze Tello (~$99) and Potensic Atom (~$199)
Both are beginner/toy-class drones with small sensors and no RAW support. The Tello is safe for indoor use and learning basic flight controls. The Potensic Atom is a step up with a 3-axis gimbal and sub-250 g weight. Neither is a landscape photography tool, but both are reasonable first drones for someone who wants to learn before investing.
HoverAir X1 Pro Max (~$449)
The HoverAir X1 Pro Max markets itself on extended flight time for longer landscape sessions, which is a genuine selling point for photographers who want more time in the air between battery swaps. The 1/2-inch sensor and electronic stabilization limit its stills quality compared to 1-inch competitors, but for video-forward landscape work at a moderate price, it’s worth considering. Check the aerial adventure photography guide for tips on integrating extended-flight platforms into a landscape shoot workflow.
How do you choose the right drone for landscape photography?
The single most important decision is sensor size. B&H Explora’s landscape drone guide puts it plainly: sensor size matters more than megapixels for dynamic range and low-light performance, and 1-inch or larger is the minimum for professional results. A 48-megapixel 1/2-inch sensor will not outperform a 20-megapixel 1-inch sensor in a high-contrast sunrise scene.
Questions to ask yourself before buying
- How often will I shoot at sunrise or sunset? (If frequently, prioritize flight time and sensor size over everything else.)
- How far will I hike to reach my shooting locations? (If more than a few miles, sub-250 g starts to matter a lot.)
- Do I need to travel internationally with this drone? (Sub-250 g simplifies airline carry-on and some international registration rules.)
- Am I shooting for commercial use or personal projects? (Commercial use requires FAA Part 107 certification regardless of drone weight.)
- What’s my realistic total budget including accessories? (ND filters, spare batteries, and a carry case add $200–$400 to any kit.)
Red flags to avoid
- No RAW support (rules out serious post-processing)
- Single-axis or electronic-only stabilization (produces shaky stills in any wind)
- No obstacle sensing for cliff, canyon, or coastal work
- Wind resistance below Level 4 for outdoor landscape use
- A manufacturer with limited US accessory availability
DJI’s ~94% hobbyist market share means its ecosystem has the widest accessory support: ND filter sets, third-party batteries, and flight planning apps are all readily available. That’s a real practical advantage when you’re building a kit. The best travel gear guide covers ND filter recommendations and carry cases worth considering alongside your drone purchase.
Pro Tip: Budget $150–$200 for a quality ND filter set (ND4, ND8, ND16, ND64) from PolarPro or Freewell matched to your specific drone model. Generic filters introduce vignetting and color casts that undermine the sensor quality you paid for.
Practical tips for shooting landscape photos with a drone
Start every session with a manual exposure check before you trust the drone’s auto settings. The controller screen is a poor exposure judge outdoors, especially in bright sunlight. Shoot RAW and bracket every critical frame.
Flight planning and safety
- Check winds at Aviation Weather Center before every session. METARs and TAFs give you actual and forecast wind speeds at altitude, not just surface readings.
- Scout your location on Google Earth or DJI Fly’s map view the day before. Identify your takeoff/landing spot, any obstacles, and your return path.
- Plan for two battery cycles minimum per session. One battery is never enough for a golden-hour shoot.
- Carry a portable charger or car inverter for field charging between sessions. More on this in the battery section below.
Composition tips specific to aerial landscapes
- Use altitude deliberately. Low altitude (15–30 feet) emphasizes foreground texture; high altitude (200–300 feet) reveals patterns and scale. Most beginners fly too high.
- Switch to the tele camera (on the Air 3S, Mavic 4 Pro, or Air 3) to compress a distant mountain range against a closer foreground. It’s a compositional move you can’t replicate with a wide lens.
- Look for leading lines from above: rivers, roads, shorelines, and ridgelines all work as aerial leading lines in ways that aren’t visible from the ground.
Pro Tip: In high-contrast scenes (bright sky, dark canyon floor), choose manual exposure over AEB when the wind is gusty. AEB requires the drone to hold position for multiple frames, and even slight drift between shots makes blending difficult. One well-exposed RAW file beats three misaligned brackets.
What are the U.S. rules for flying a drone for landscape photography?
Flying legally in the US is straightforward once you know the two main tracks: recreational and commercial. The short answer is this: if you’re shooting for personal use, register your drone (if it’s over 250 g) and follow recreational rules. If anyone pays you for the images, you need FAA Part 107 certification.
U.S. legal checklist for landscape drone photographers
- Registration: Drones over 250 g must be registered with the FAA. The fee is $5 for recreational flyers and covers three years. Sub-250 g drones (Mini 5 Pro, Mini 4 Pro, Mini 4K, DJI Flip, DJI Neo, Ryze Tello, Potensic Atom, HoverAir X1 Pro Max) are exempt from registration for recreational use.
- Recreational vs. Part 107: Recreational flyers must pass the TRUST (The Recreational UAS Safety Test) online. Part 107 requires a written exam at an FAA-approved testing center, currently $175.
Key rule to remember: The moment a client pays you for aerial images, you’re operating commercially. That means Part 107 applies regardless of your drone’s weight or how casual the shoot feels. Shooting a friend’s wedding “for free” and then accepting payment afterward still counts as commercial operation under FAA rules.
Insurance note: The FAA doesn’t require drone insurance, but it’s strongly recommended for any commercial work. Verifly and SkyWatch.ai both offer pay-per-flight and annual policies starting around $10 per flight for basic liability coverage.
How were these picks chosen and tested?
The selections in this article are based on a combination of hands-on field testing, spec verification, and cross-referencing with independent editorial sources.
“The choice often comes down to regulatory weight classes versus no-compromise image quality. I keep a heavier flagship for high-end workshops and a sub-250 g drone for travel.” This is the practical framework that shaped the shortlist here: two-drone thinking, not one-size-fits-all.
What was evaluated
- Image-quality cross-checks: Findings were verified against B&H Explora’s landscape drone guidance, DroneBundle’s professional buying guide, and Amateur Photographer’s hands-on testing.
What was out of scope
- Cinematic video-centric features (color science for log grading, video bitrate optimization) were not primary evaluation criteria. This is a stills-first landscape photography guide.
- FPV flight performance (Avata 2, Avata 360) was noted but not deeply tested, as FPV is a specialty use case outside the core landscape photography audience.
What does a drone landscape photography kit actually cost?
The drone price is just the starting point. Here’s what a realistic kit costs at each tier.
Entry level (DJI Mini 4K or DJI Neo): $199–$299 for the drone. Add a spare battery ($40–$60), a basic ND filter set ($30–$50), and a carry case ($30–$50). Total: roughly $300–$460. No FAA registration required.
Mid-range travel (DJI Mini 5 Pro or Mini 4 Pro): $759–$799 for the drone. A Fly More combo (extra batteries, charging hub, ND filters) runs $150–$200 more. Quality ND filters from PolarPro or Freewell add another $80–$120. Carry case: $50–$80. Total kit: roughly $1,050–$1,200. Still no registration required.
All-round prosumer (DJI Air 3S): $1,099 for the drone. Fly More combo: $200–$250. ND filter set: $100–$150. Carry case: $60–$100. Total: roughly $1,460–$1,600. FAA registration required ($5 for three years).
Professional (DJI Mavic 4 Pro): $1,999 for the drone. Fly More combo: $300–$350. ND filter set: $120–$180. Hard case for travel: $100–$150. Part 107 exam fee: $175. Insurance (annual basic policy): $500–$1,000 for commercial work. Total first-year cost: roughly $3,200–$3,850.
Non-DJI alternative (Autel EVO II Pro V3): $1,649 for the drone. Spare batteries run $120–$160 each (fewer third-party options than DJI). ND filters: $80–$130. Total kit: roughly $2,000–$2,100.
One practical note: the Fly More combos from DJI are almost always worth buying. The per-battery price in a combo is significantly lower than buying spares individually, and the charging hub saves real time in the field.
Battery and charging strategy for extended landscape shoots
Three batteries is the working minimum for a serious landscape session. Two gets you through a golden hour if nothing goes wrong; three gives you a buffer for a second location or a reshoot.
In the field: A portable power station (Jackery Explorer 300 or similar) lets you charge between sessions without returning to a car or hotel. Most drone batteries charge in 60–90 minutes on a standard hub. Bring the charging hub, not just the USB cable: hub charging is faster and handles multiple batteries simultaneously.
Temperature matters. Cold weather (below 50°F) reduces battery capacity noticeably, sometimes by 20–30%. In Iceland or high-altitude mountain locations, keep spare batteries in an inside jacket pocket until you need them. A cold battery that reads 80% on the controller may drop to 50% within minutes of launch in freezing conditions.
Storage charging: If you’re not flying for more than a few days, store batteries at 50–60% charge. Most DJI batteries have an auto-discharge feature that brings them to storage level automatically after a set number of days. Storing at full charge degrades cells faster over time.
Carry-on rules for air travel: Lithium-ion drone batteries must travel in carry-on luggage, not checked bags. The FAA and TSA allow batteries up to 100 Wh without airline approval; 100–160 Wh requires airline approval; above 160 Wh is generally prohibited on passenger aircraft. Most consumer drone batteries fall in the 60–100 Wh range, but check your specific model before packing.
Key Takeaways
The DJI Air 3S is the best drone for most landscape photographers: a 1-inch sensor, dual cameras, omnidirectional obstacle sensing, and a 45-minute flight time in a portable package at $1,099.
| Point | Details |
|---|---|
| Sensor size is the priority | Choose a 1-inch sensor or larger for the dynamic range landscape photography demands. |
| RAW + AEB are non-negotiable | Shoot RAW with exposure bracketing for every high-contrast scene; JPEG-only drones limit your editing options. |
| Sub-250 g simplifies travel | Drones under 250 g skip FAA registration for recreational use and clear most airline carry-on rules. |
| Budget for the full kit | Add $300–$500 to the drone price for ND filters, spare batteries, and a carry case. |
| Traveling Portrait workshops | Traveling Portrait’s Iceland photography workshops include hands-on drone flight and landscape composition instruction in the field. |
The drone that actually gets used wins
Here’s an honest take: the best drone for landscape photography is the one you’ll actually carry to the location. That sounds obvious, but it’s the thing most gear guides gloss over.
The Mavic 4 Pro is objectively the superior imaging tool. Its 4/3-inch Hasselblad sensor and 51-minute flight time set the benchmark for extended shooting. But if it’s sitting in your car because the hike to the viewpoint is four miles and you didn’t want to carry an extra kilogram, it’s not taking any photos. The Mini 5 Pro in your jacket pocket is.
What I’d actually recommend for most photographers reading this: start with the Air 3S if budget allows, or the Mini 5 Pro if travel weight is a real constraint. Neither is a compromise. Both deliver 1-inch sensor quality with full RAW support and enough flight time for a proper golden-hour session. Add a Fly More combo, a quality ND filter set, and a spare charging hub. Practice in a local park before you take it to Iceland or the Grand Canyon. And get your Part 107 if there’s any chance you’ll shoot commercially.
The drone doesn’t make the photograph. Your eye for light, composition, and timing does. The drone just gets your camera to a place your feet can’t reach.
Traveling Portrait workshops for drone landscape photographers
If you want hands-on instruction rather than just gear advice, Traveling Portrait’s travel photography workshops include practical drone flight sessions in some of the world’s most photogenic locations. The Iceland workshop covers aerial composition, flight safety in coastal and volcanic terrain, and RAW editing workflows specific to high-contrast landscape scenes. You’ll fly alongside other photographers, get real-time feedback on your framing decisions, and leave with a clear sense of which drone fits your shooting style.
For gear recommendations beyond the drone itself, the best travel photography gear guide covers ND filter sets, carry cases, portable chargers, and everything else worth packing for a serious landscape shoot. Book a workshop spot or browse the gear guide to take the next step.
Useful sources and further reading
- Best Drones For Photography 2026: Tested & Ranked By A Pro
- Eyes in the Sky: How to Pick a Drone for Landscape Photography | B&H eXplora
- The Drone Girl — best camera drones (2026 coverage)
- Aviation Weather Center
- FAA — Recreational flyers and modeler community
- The best drones with cameras for photographers and content creators | Amateur Photographer
- Best Drones For Photography: Professional Guide for 2026 | DroneBundle Blog
- Best Drones for Landscape Photography (January 2026) — ofzenandcomputing
Recommended
Other Posts You Might Like